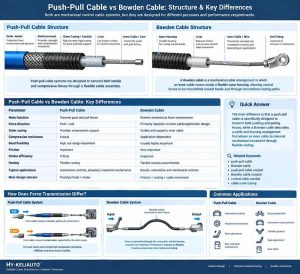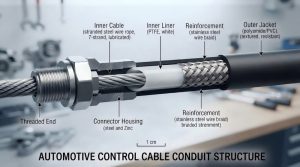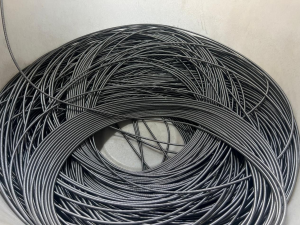
Push-pull cable conduits are important components in mechanical control systems that require reliable force transmission and consistent movement. Typical applications include automotive door locks, seat adjusters, gear selection systems and controls for agricultural machinery. In case of a conduit failure, the consequences may be an excessive operating force, limited travel, low stroke efficiency, or early wear of the system.
Push-pull cable conduit failure analysis is more than just finding a damaged component. The engineers have to understand why the failure occurred. They have to verify the mechanism. They have to implement corrective action to ensure that the failure does not happen again.
In this guide, we will look at 7 common causes of push-pull cable conduit failure, explain how to diagnose each one, and provide practical ways to improve durability and operational reliability.
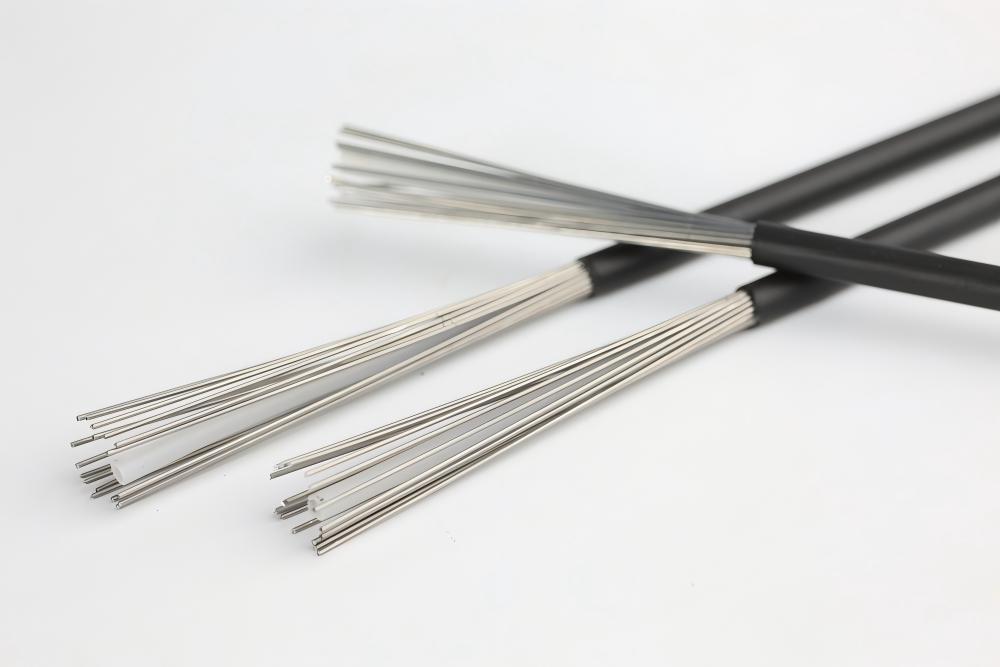
How to Identify and Diagnose Push-Pull Cable Conduit Failure
A failed conduit does not always show obvious external damage. Increased operating force, inconsistent movement, and reduced effective stroke may indicate internal friction, structural deformation, or assembly problems.
Begin with three diagnostic steps:
- Identify the failure symptom: Determine whether the problem involves binding, excessive force, lost travel, visible damage, or gradual performance deterioration.
- Inspect the complete assembly: Examine the routing path, mounting points, outer casing, end fittings, and accessible internal components.
- Measure operating performance: Record push-pull force, effective stroke, and movement consistency under controlled conditions.
Compare the results with approved drawings, product specifications, or a known-good sample. If the failure occurs only after installation, investigate the assembled configuration rather than testing the conduit in isolation.
A useful investigation should establish a clear relationship between the observed symptom, the suspected failure mechanism, and the test evidence. This prevents unnecessary component replacement and helps engineering teams identify the actual source of the problem.
Seven Common Causes of Push-Pull Cable Conduit Failure
1. Excessive Bending and Incorrect Cable Routing
Common symptoms: high operating forces, localised binding, uneven movement, or premature wear.
Overbending increases the contact pressure between the inner cable and the conduit liner. Movement may be further restricted by twist, unnecessary routing changes, and installation stress.
How to recognise: Check the installed routing path and compare the actual bend radius with the design requirements. Take readings of operating force at various points along the stroke to identify areas of resistance.
How to stop it: Design the system to specify routing constraints. Keep the minimum bend radius specified. Clamp the conduit without introducing twisting or compression. If there is movement in operation, then think about the entire motion envelope, not just the static installation.
2. Liner Wear and Excessive Internal Friction
Typical symptoms: Gradually increasing operating force, intermittent sticking, visible wear debris, or inconsistent movement after repeated use.
The liner provides a sliding interface between the inner cable and the outer conduit. Unsuitable material properties, surface damage, contamination, or inadequate wear resistance can increase friction over time.
How to diagnose: Inspect the liner and inner cable for scoring, abrasion, debris, and uneven contact marks. Compare operating-force measurements before and after representative cycling.
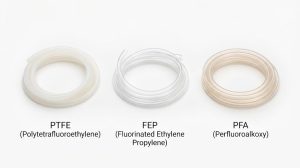
How to prevent it: Select liner materials according to friction, wear, temperature, and environmental requirements. Depending on the application, materials such as PE, POM, PTFE, PA, and PBT may offer different performance characteristics.
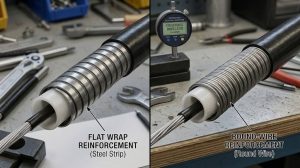
For customized assemblies, the liner should be evaluated together with the inner cable, operating stroke, and duty cycle. Keli's flat wrap cable outer casing solutions illustrate how liner configurations can be adapted to different application requirements.
3. Outer Conduit Deformation and Insufficient Compression Resistance
Symptoms: typical dented or flattened housing, reduced cable movement, reduced effective stroke, irregular force transmission.
The outer conduit needs to support the inner cable, yet must be flexible enough for the task. Over-clamping, impact from outside, incorrect reinforcement, or mechanical loads in excess of design intent can distort the casing.
Altering the shape of the conduit could limit the room for inner-cable movement, adding friction and cutting performance.
Diagnosed how: Look at the damaged area and see how it compares in size to the approved drawing. Check mounting pressure, installation clearance, and any possible external contact points.
How to prevent: Match reinforcement to mechanical requirements of the application - Establish acceptable dimensional limits and control installation pressure. If resistance to compression is of critical importance, test the entire assembly under representative loading conditions.
4. Fatigue from Repeated Push-Pull Cycles
Typical symptoms: Performance deterioration after extended use, repeated failures at the same location, broken reinforcement wires, or loosening of structural components.
Repeated motion can produce fatigue, especially when bending, vibration, and mechanical stress concentrate around fixed points or transitions. A conduit that passes an initial functional check may still have insufficient durability for its intended service life.
How to diagnose: Record the operating cycles before failure and inspect the damaged area. Review the actual stroke, load, operating frequency, and routing conditions to determine whether the test reproduces the service environment.
How to prevent it: Establish a service-life target and validate the assembly through representative push-pull cable durability testing. Pay particular attention to repeatedly flexed sections, mounting points, and areas where vibration or bending may concentrate stress.
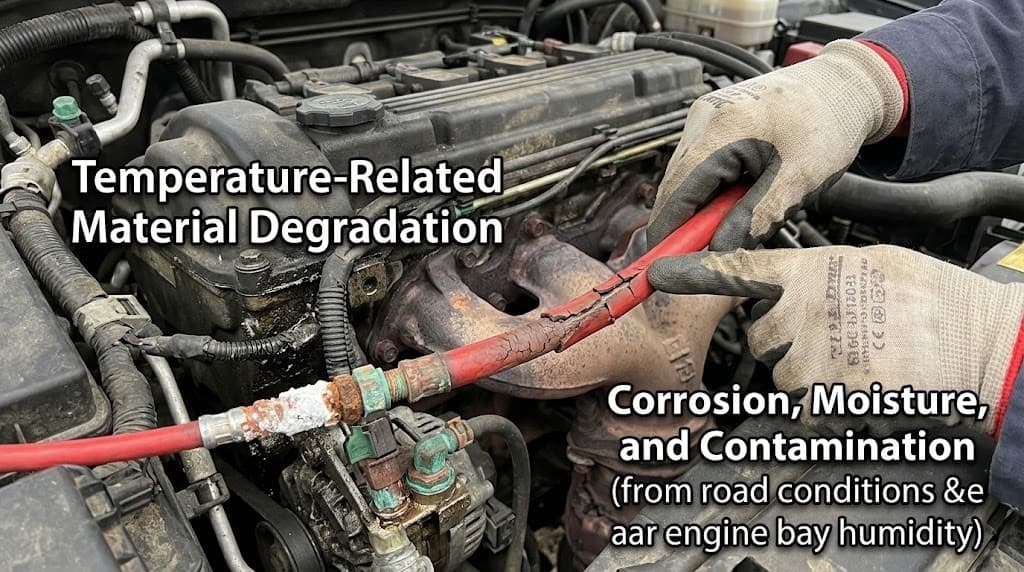
5. Temperature-Related Material Degradation
Typical symptoms: Hardening, softening, cracking, dimensional changes, or increased operating resistance after temperature exposure.
Liner, coating, and other polymer materials respond differently to heat and cold. Temperature cycling may also affect dimensional stability and the interaction between components.
A material that performs adequately at room temperature may not maintain the required characteristics throughout the application's operating range.
How to diagnose: Check material specifications and operating temperature records. Check the affected components and compare dimensions and operating performance before and after exposure to the specified conditions.
How to stop it: Select materials based on continuous and peak temperatures, exposure time, and temperature cycling. Don’t trust the temperature rating of a single material; validate the entire assembly under relevant conditions.
6. Corrosion, Moisture, and Contamination
Typical symptoms: Corrosion marks, surface damage, increasing operating resistance, or progressive deterioration around exposed components.
Moisture, road salt, dust, and chemicals can affect metal reinforcement, sliding surfaces, and protective coatings. Problems may be concentrated near end fittings or locations where protective barriers are damaged.
How to diagnose: Inspect the assembly for corrosion, deposits, coating damage, and potential contamination entry points. Compare the findings with the operating environment and maintenance history.
How to stop it: Define suitable corrosion protection, compatible materials, and suitable end protection. For harsh environments, test for resistance to representative exposure conditions, and inspect interfaces and the main conduit body.
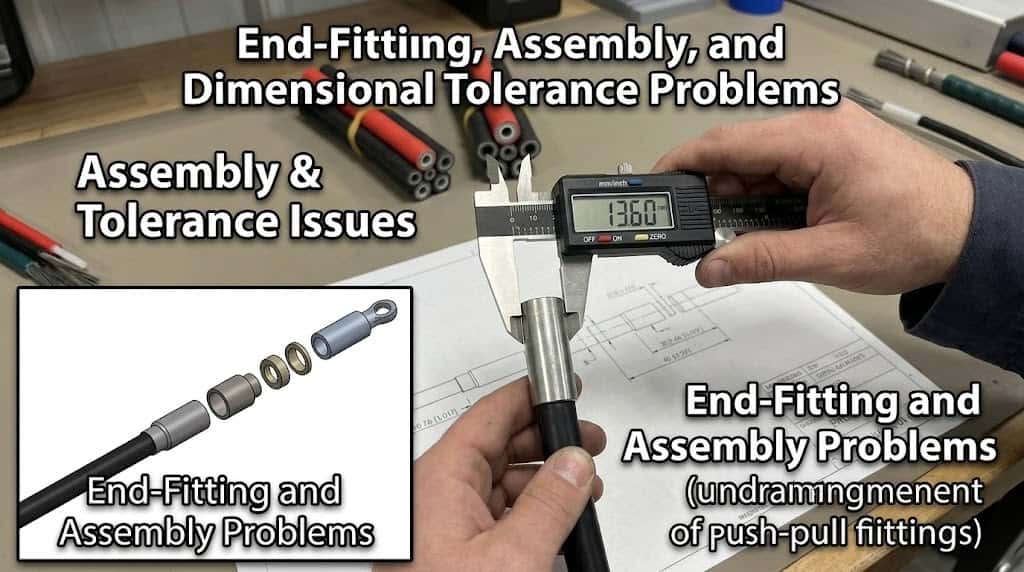
7. End-Fitting, Assembly, and Dimensional Tolerance Problems
Typical symptoms: Loose connections, inconsistent effective stroke, difficult installation, or performance differences between nominally identical assemblies.
A conduit may meet its individual dimensional requirements but still perform poorly after integration. Incorrect assembly length, mismatched fittings, insecure retention, and accumulated dimensional tolerances can introduce play or misalignment.
How to diagnose: Check critical dimensions against approved drawings. Inspect end connections, retention features, assembly records, and finished stroke. Measure operating force using a consistent test procedure.
How to prevent it: Define critical-to-quality dimensions, standardize assembly procedures, and establish clear acceptance criteria. Validate the finished cable assembly in its intended configuration instead of approving performance solely through component-level inspection.
Push-Pull Cable Conduit Troubleshooting: Symptoms and Root Causes
The following push-pull cable troubleshooting table helps engineers prioritize initial checks. Each symptom can have multiple causes, so the suspected mechanism must be verified.
| Observed symptom | Possible root causes | Recommended first check |
| Excessive operating force | Tight bends, liner wear, contamination | Inspect routing and measure operating force |
| Reduced effective stroke | Conduit deformation, loose fittings, dimensional errors | Check casing dimensions and connections |
| Performance deteriorates over time | Fatigue, liner wear, temperature exposure | Review cycle history and wear patterns |
| Corrosion or surface damage | Moisture, chemicals, inadequate protection | Inspect exposure points and protective layers |
| Inconsistent performance between units | Tolerance variation, assembly inconsistency | Compare dimensions and production records |
Record the failure location, operating conditions, measured results, suspected cause, corrective action, and verification outcome. This creates traceable evidence for engineering review and continuous quality improvement.
How to Prevent Recurring Failures Through Design and Quality Control
Preventing recurring control cable conduit failures requires coordinated controls throughout design, manufacturing, and final assembly.
Design validation should take into account actual application requirements such as bend radius, push-pull load, effective stroke, temperature exposure and expected service life. A straight, unloaded sample might not reveal problems encountered after installation.
Manufacturing quality control should be focused on performance-affecting characteristics. These may include critical dimensions, reinforcement consistency, liner condition, coating quality and end-fitting geometry depending on the product design.
The final assembly validation is to make sure the entire system works as it is supposed to. Suitable checks include operating force over the stroke, effective travel, connection security, and performance after representative cycling.
Corrective actions shall be taken for the identified failure mechanism. If excessive clamp pressure results in conduit deformation, changing the liner material alone is not likely to be a solution. If the contamination is causing the resistance to increase, tighter dimensional tolerances may not address the cause.
Where appropriate, OEM quality teams are to document root cause analyses and update process risk assessments, inspection plans and validation records. Acceptance limits should be derived from approved drawings, product specifications, applicable standards, or customer requirements, rather than assumed universal thresholds.
Working with a Manufacturer to Resolve Conduit Failures
An effective supplier investigation begins with complete application information. Provide drawings, dimensions, installation photographs, operating conditions, required stroke, loading information, and details about when the failure first appeared.
Whenever possible, retain failed samples and provide comparison data from assemblies that continue to operate correctly. Information about cycle count, temperature exposure, contamination, and maintenance history can help distinguish a material problem from an installation or design issue.
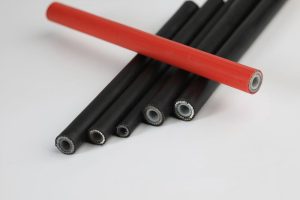
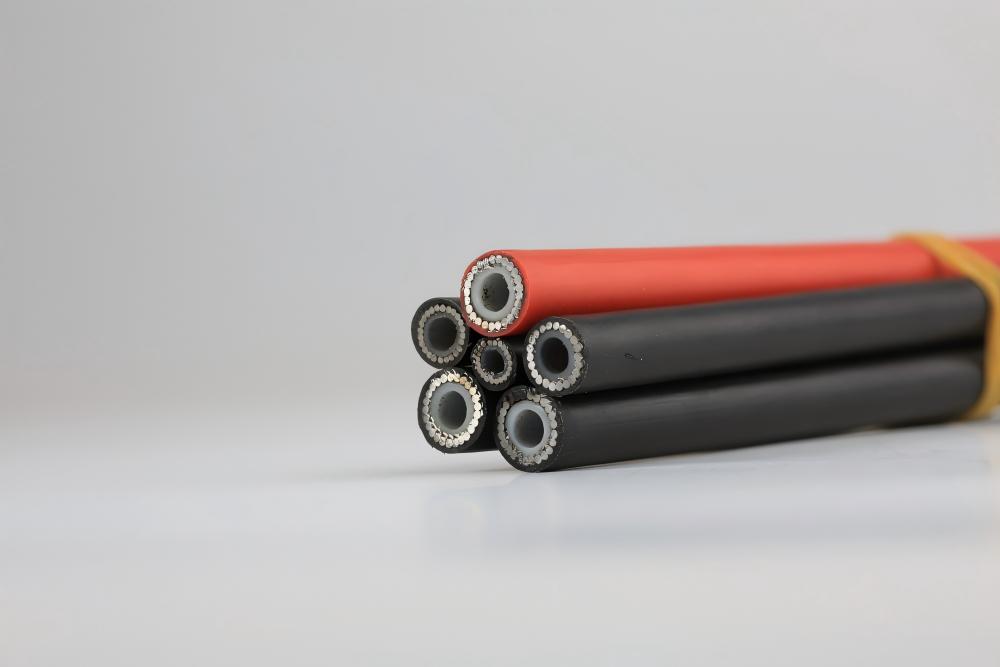
For customized applications, push-pull outer casing and cable protection solutions can be evaluated against the intended mechanical loads, routing conditions, liner requirements, and dimensional constraints. The appropriate configuration should be confirmed through technical review and relevant validation.
Keli provides custom precision tubing and control cable conduit for OEM and ODM projects. Backed by over 30 years of manufacturing experience, the company supports application specific requirements for the automotive and other industrial sectors. Learn more about its manufacturing capabilities by looking through the Keli manufacturer profile. A corrective action should be considered complete only after the proposed change has been verified under relevant operating conditions and the results documented.
Conclusion: Turn Failure Analysis into Long-Term Reliability
Push-pull cable conduit failure analysis should connect each observed symptom with a verified root cause and a measurable corrective action. Excessive bending, liner wear, deformation, fatigue, temperature exposure, contamination, and assembly variation can all affect performance, but they require different solutions. For OEM engineers and quality teams, a structured approach combining inspection, measurement, and controlled testing helps reduce repeat failures and improve long-term reliability.
Experiencing excessive operating force, conduit deformation, or premature wear? Contact Keli with your application details, drawings, or failure samples to discuss a suitable push-pull outer casing solution.
Frequently Asked Questions
Q1: What are the symptoms of failure of push-pull cable conduit?
Common indications include increased operating force, binding, reduced stroke, conduit deformation and liner wear. Need to do some more inspection to confirm the root cause.
Q2: Why does a push-pull cable get harder to operate after a while?
Common causes are liner wear, contamination, corrosion, tight bends and component misalignment.
Q3: How can OEMs differentiate conduit friction from inner cable failure?
Check the assembly as a whole. Measure the operating force. Testing at the component level under controlled conditions can help to pinpoint the source of the resistance.
Q4: What tests help determine the root cause of push-pull cable failure?
For example, useful tests may include force measurement, stroke testing, dimensional inspection, durability cycling and temperature or environmental testing under the relevant operating conditions.